Skip to Content
    Qafka
    CTRL K
    CTRL K
    • Introduction
      • Quick Start (React Native)
      • Quick Start (Website)
      • React Native Configuration
      • Overview
      • npm & React
      • Options Reference
      • WordPress
      • React Native Widget
      • Headless SDK
      • Theming
      • Context
      • Navigation
      • External Navigation
      • Handling Tools
      • Voice Chat
      • Sub-Projects
      • Error Handling
      • CLI
      • Dashboard
      • Onboarding
      • Invitations
      • Billing
      • Usage
      • Settings
      • Sign-in & Account
      • Dashboard Assistant
        • Project
        • Overview
        • Conversations
        • Chat Test
        • Sub-Projects
        • Analysis
        • Unanswered Questions
        • Insights
        • Configuration
        • AI Behavior
        • Members
        • Documents
          • Overview
          • Create with AI
          • Versions
          • Response Channel
        • Action Logs
        • Navigation Rules
        • External Destinations
        • Chat Theme
        • PII Masking
        • Websites
        • Mobile Apps
        • API Keys
        • Project Settings
      • API Key Security
    • Introduction
      • Quick Start (React Native)
      • Quick Start (Website)
      • React Native Configuration
      • Overview
      • npm & React
      • Options Reference
      • WordPress
      • React Native Widget
      • Headless SDK
      • Theming
      • Context
      • Navigation
      • External Navigation
      • Handling Tools
      • Voice Chat
      • Sub-Projects
      • Error Handling
      • CLI
      • Dashboard
      • Onboarding
      • Invitations
      • Billing
      • Usage
      • Settings
      • Sign-in & Account
      • Dashboard Assistant
        • Project
        • Overview
        • Conversations
        • Chat Test
        • Sub-Projects
        • Analysis
        • Unanswered Questions
        • Insights
        • Configuration
        • AI Behavior
        • Members
        • Documents
          • Overview
          • Create with AI
          • Versions
          • Response Channel
        • Action Logs
        • Navigation Rules
        • External Destinations
        • Chat Theme
        • PII Masking
        • Websites
        • Mobile Apps
        • API Keys
        • Project Settings
      • API Key Security

    On This Page

    • Prerequisites
    • 1. Add your website
    • 2. Copy the snippet
    • 3. Verify
    • Next steps
    Question? Give us feedback Edit this page 
    Getting StartedQuick Start (Website)

    Quick Start (Website)

    Add the Qafka assistant to a public website with a copy-paste snippet — no build step required.

    Prerequisites

    • A Qafka account (app.qafka.com )
    • Access to edit your website’s HTML (or a WordPress admin login)

    1. Add your website

    From the dashboard, choose Add an AI agent to your website (for public sites where visitors aren’t signed in — if your app requires login instead, use the npm & React path).

    Enter your website’s URL and confirm you own it (or are authorized to add an assistant to it):
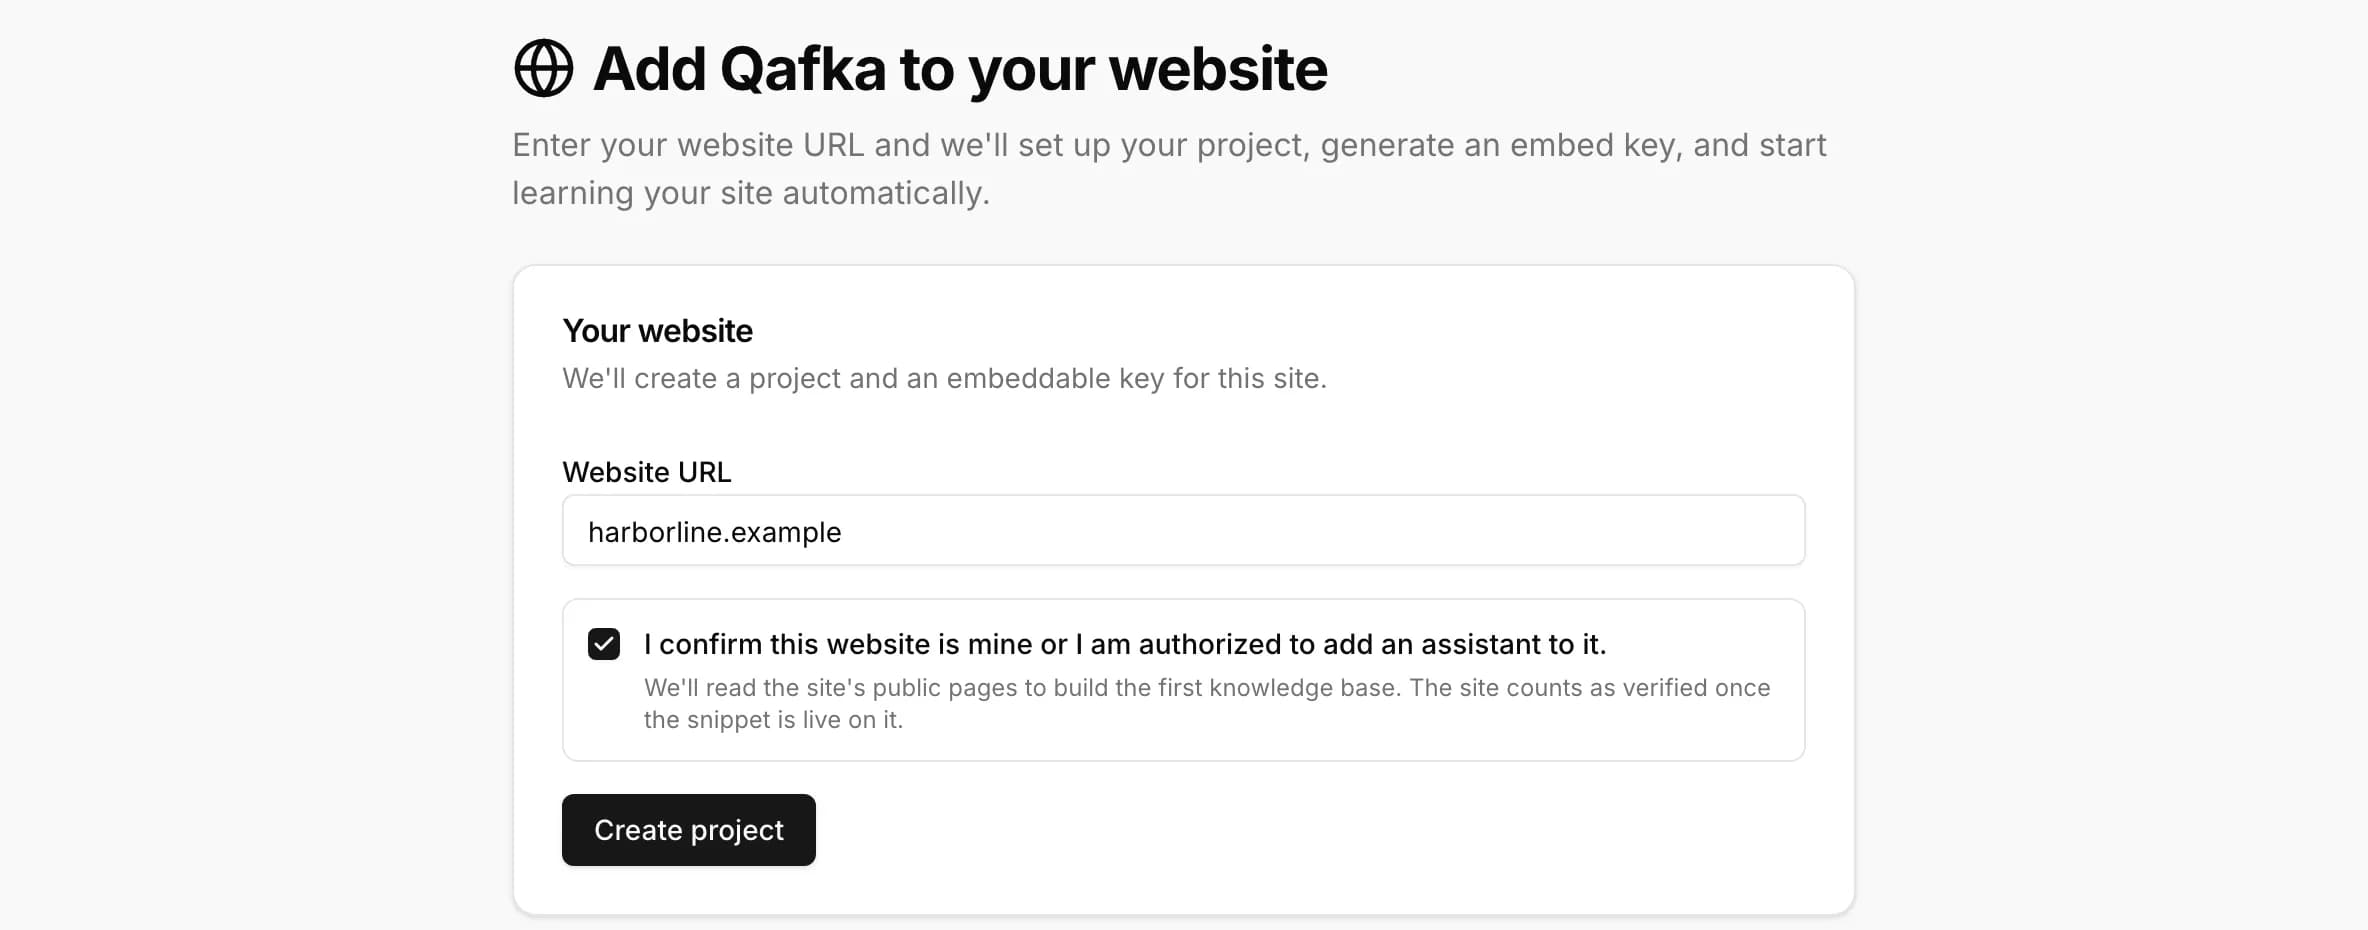
    Add Qafka to your website: URL field and ownership confirmation

    • Qafka creates a project and a Web (publishable) key for it, and registers your site’s domain automatically on the Websites page as your own site. That key only works on your site’s domain, and its restriction can’t be changed afterward — see Web SDK Overview › Allowed domains if you’ll need the assistant on another domain too (staging, localhost, a second site).
    • It reads your site’s public pages to build a starting knowledge base, extract navigation rules, and draft branding and AI behavior — this runs in the background and can take a few minutes.

    2. Copy the snippet

    The dashboard shows a script tag built from your new Web key:

    <script src="https://cdn.qafka.com/v1/qafka.js" data-key="qafka_pk_..." async></script>

    Paste it once, right before your page’s closing </body> tag:

    • Plain HTML — add the line to any page you want the assistant on.
    • Template or framework — add it to the one file every page shares (a layout, footer, or base template) so every page gets it at once.
    • WordPress — skip the snippet and use the WordPress plugin instead; paste the same key into its settings.

    You can copy this snippet again anytime from the project’s API Keys page — Web keys are public by design and shown in full.
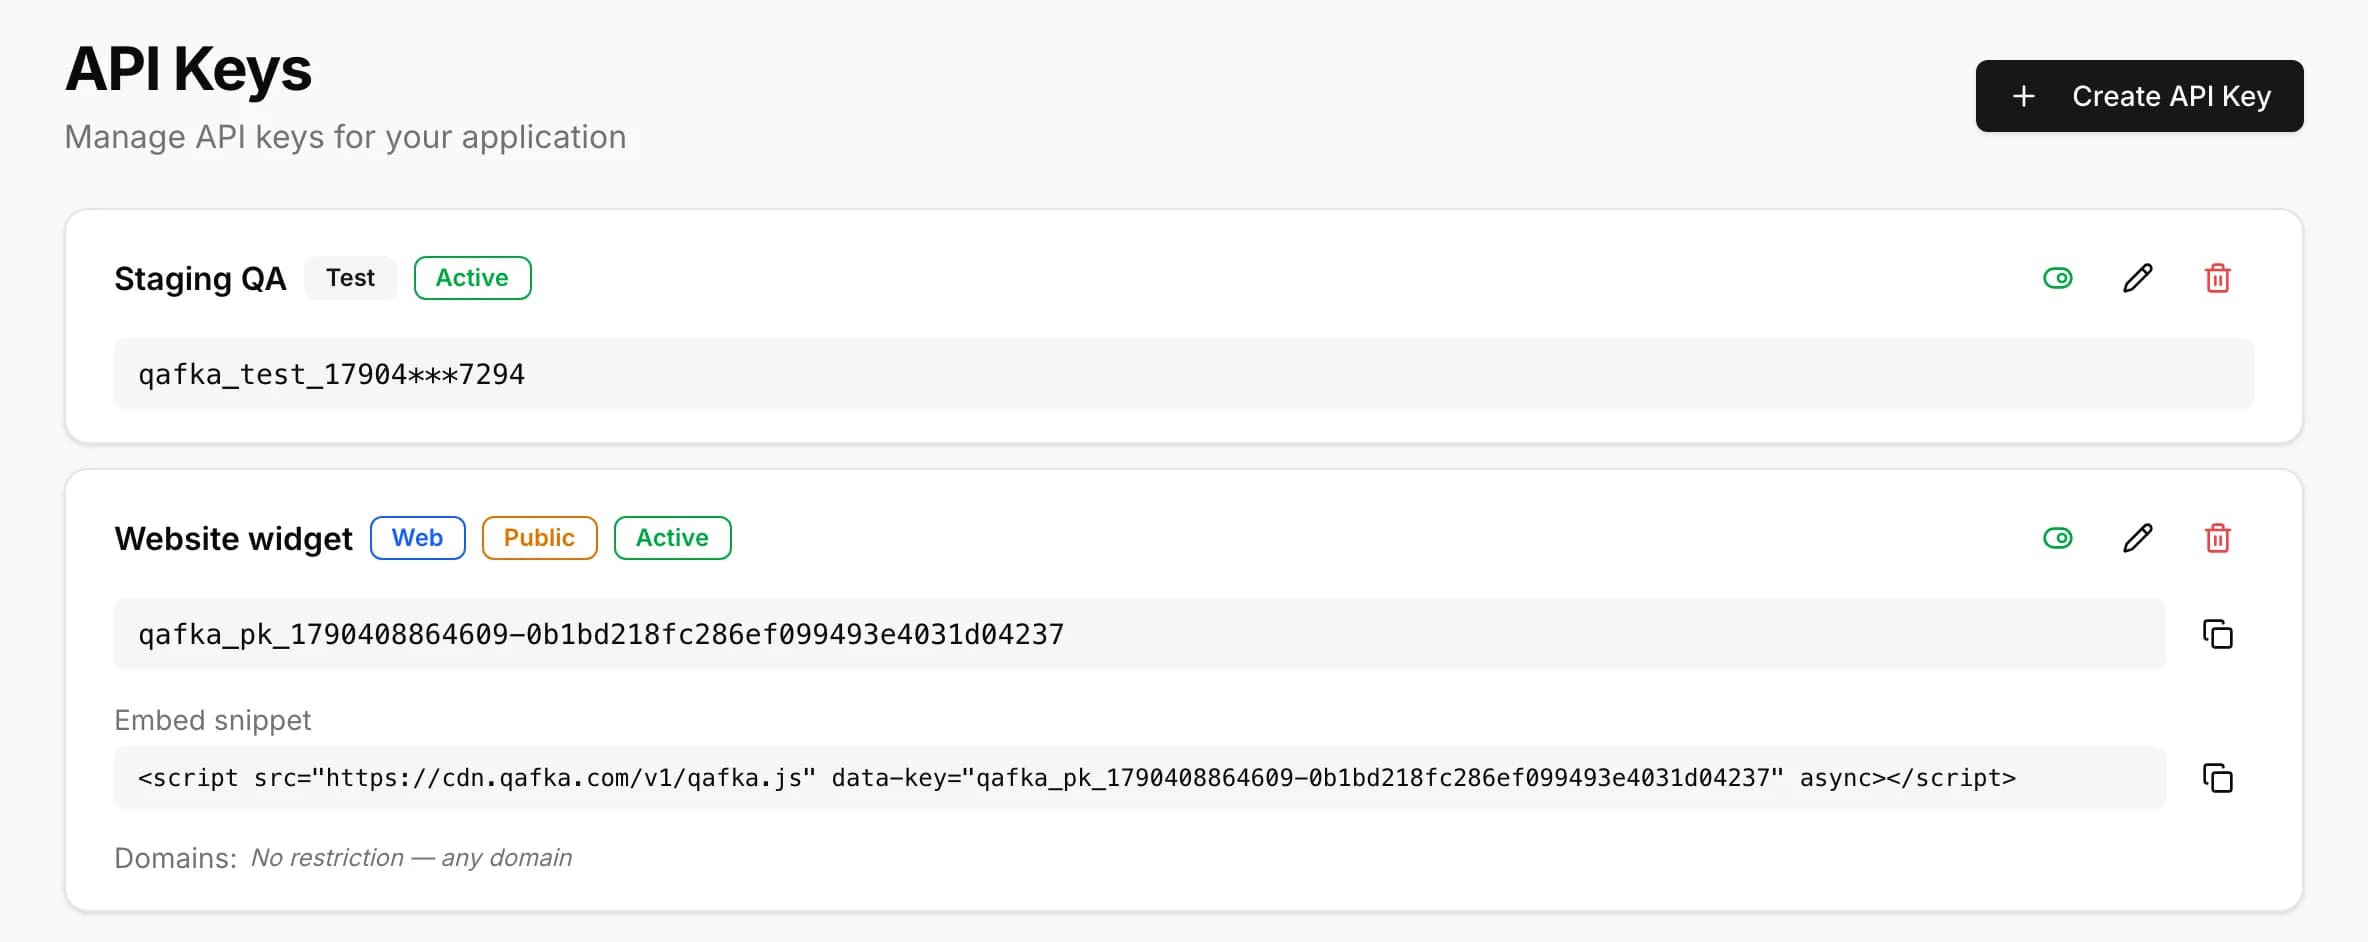
    API Keys page with the Web key and its embed snippet

    3. Verify

    Open your site and load a page with the snippet on it. The dashboard’s onboarding screen shows the connection status live: waiting for the first visit, then confirmation once the snippet is live on your site. The assistant renders as a chat bubble in the bottom-right corner.
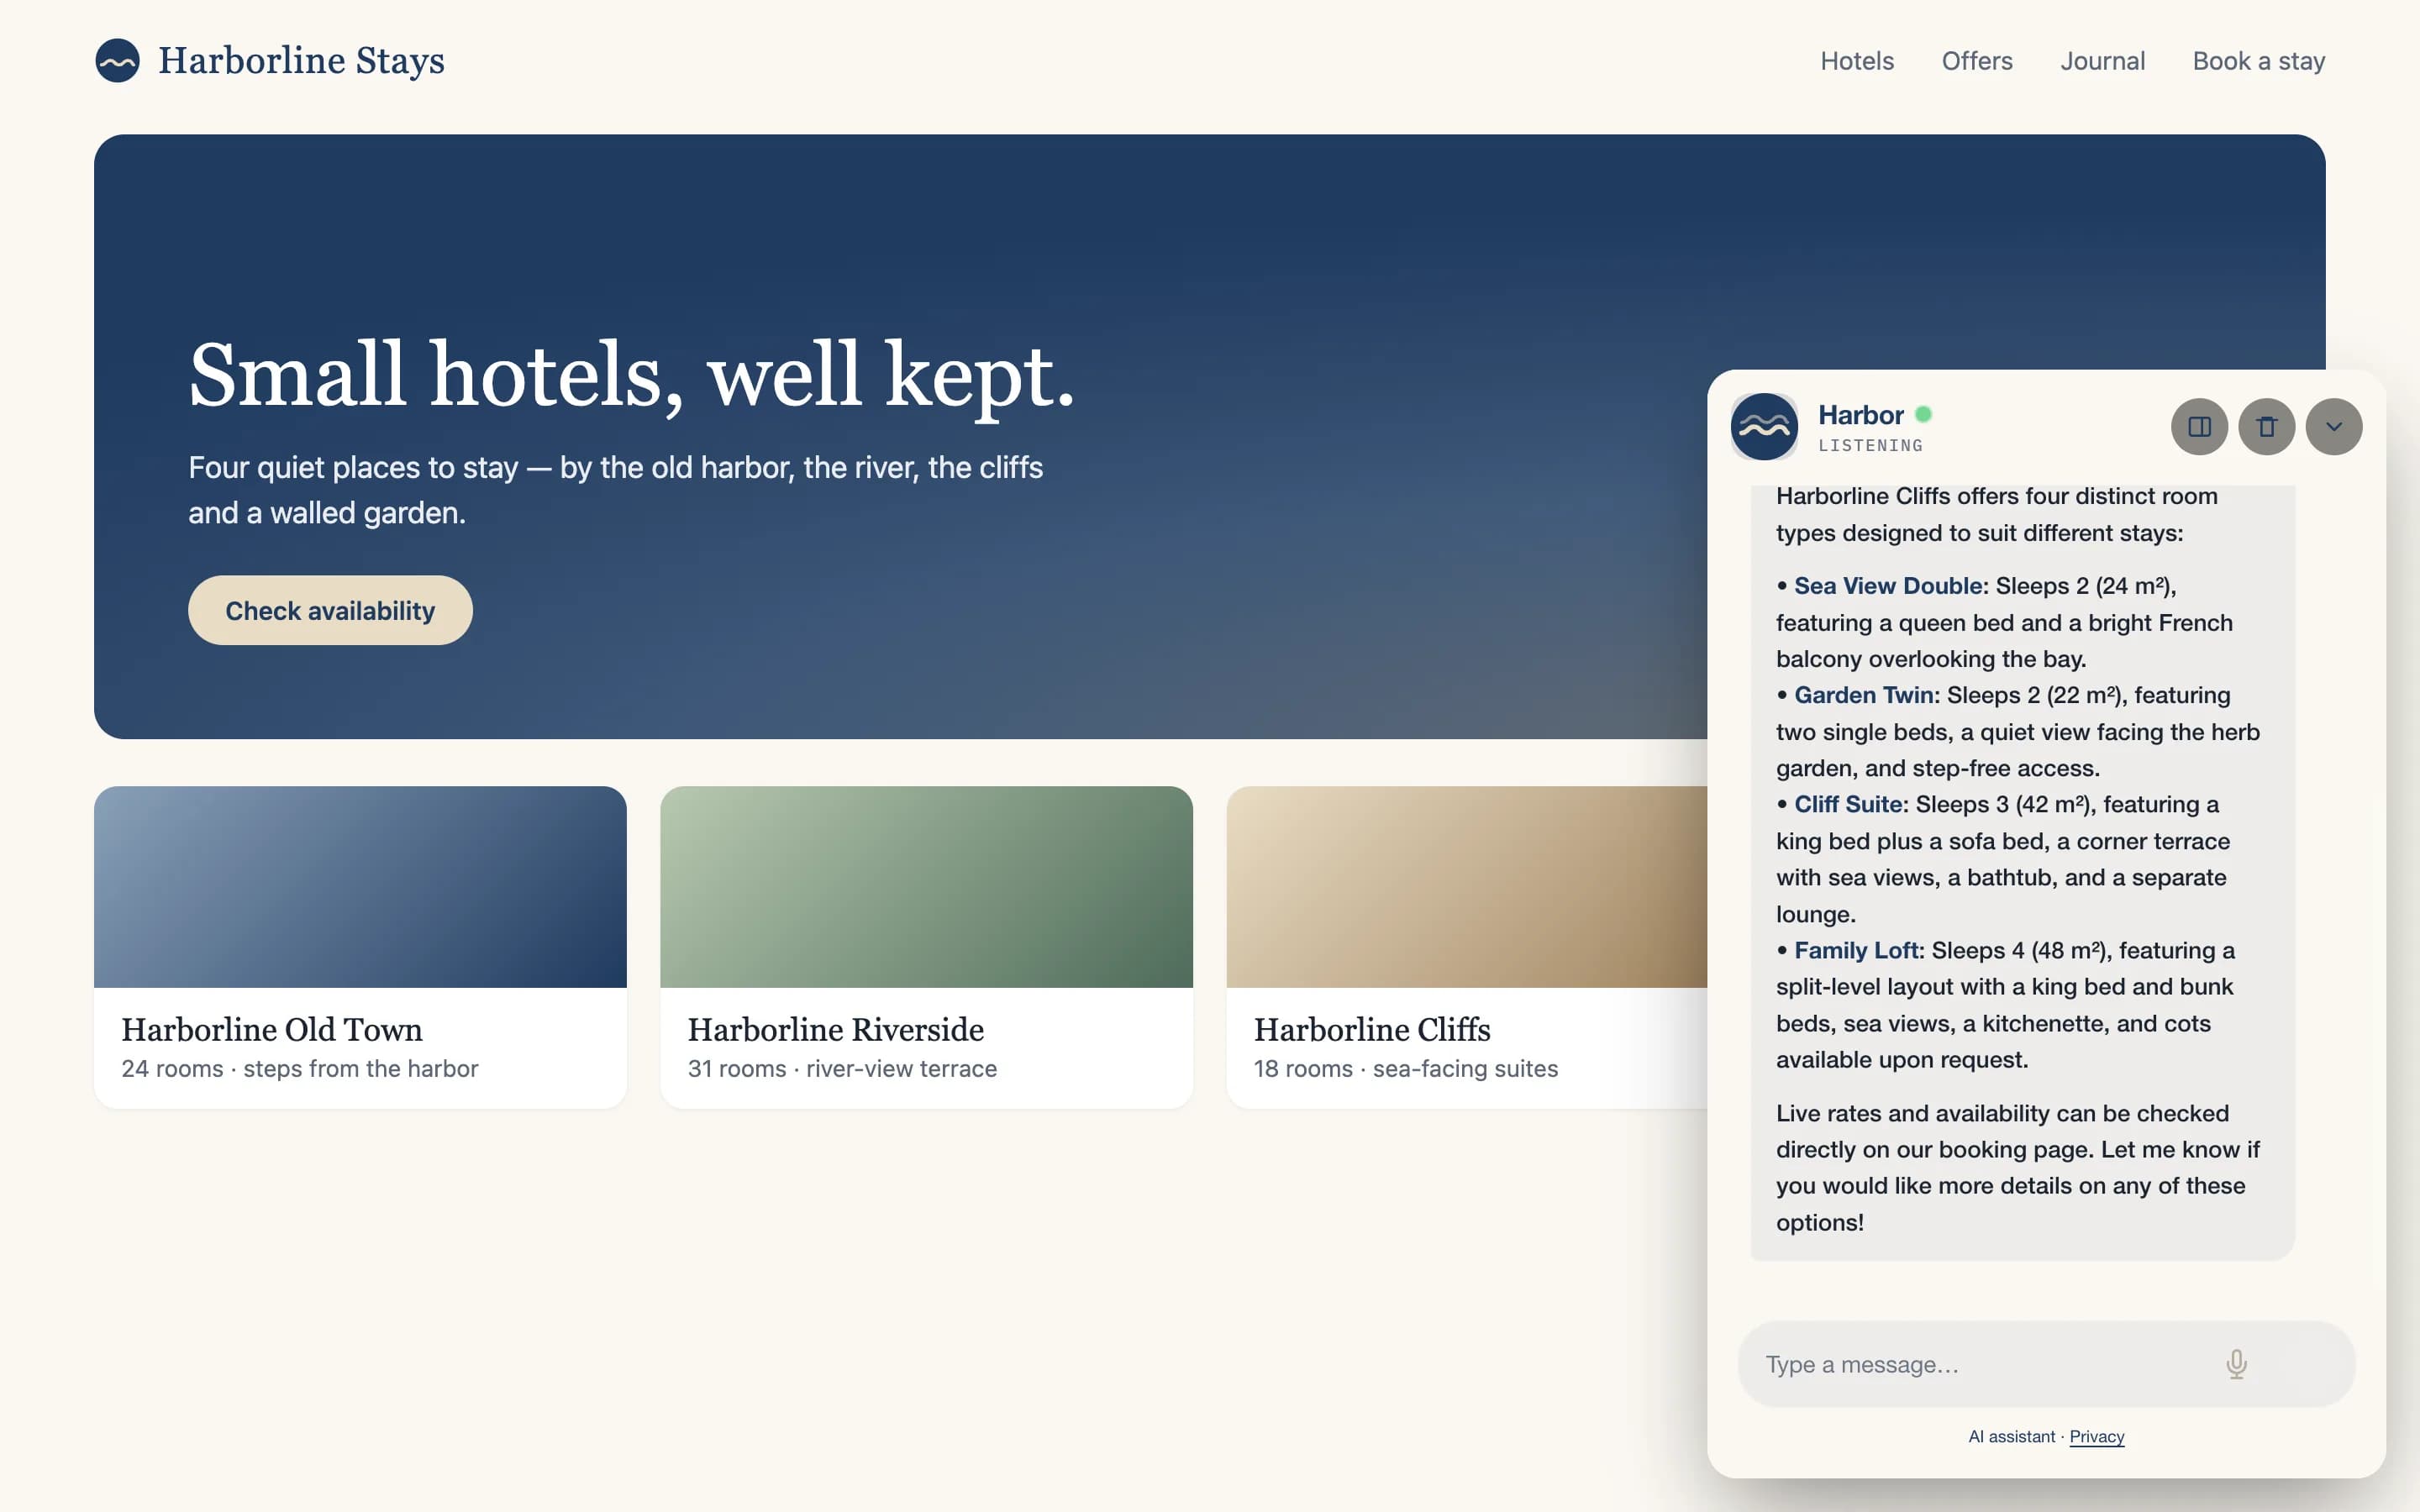
    The assistant open on a website, answering a question with a tool result

    Next steps

    • Web SDK Overview — CDN data-* attributes, media cards, voice
    • Options Reference — every data-* attribute and npm option
    • npm & React — for a signed-in web app instead of a public site
    • API Key Security — how Web keys are restricted
    Last updated on October 1, 2026
    Quick Start (React Native)React Native Configuration

    © 2026 Qafka Labs OÜ